Supply and demand · Free guide
You bought the first touch. It went straight through.
A supply or demand zone tells you where to look, never when to click. Here's how to keep only the zones that earned it, and wait for the answer before you buy the knock.
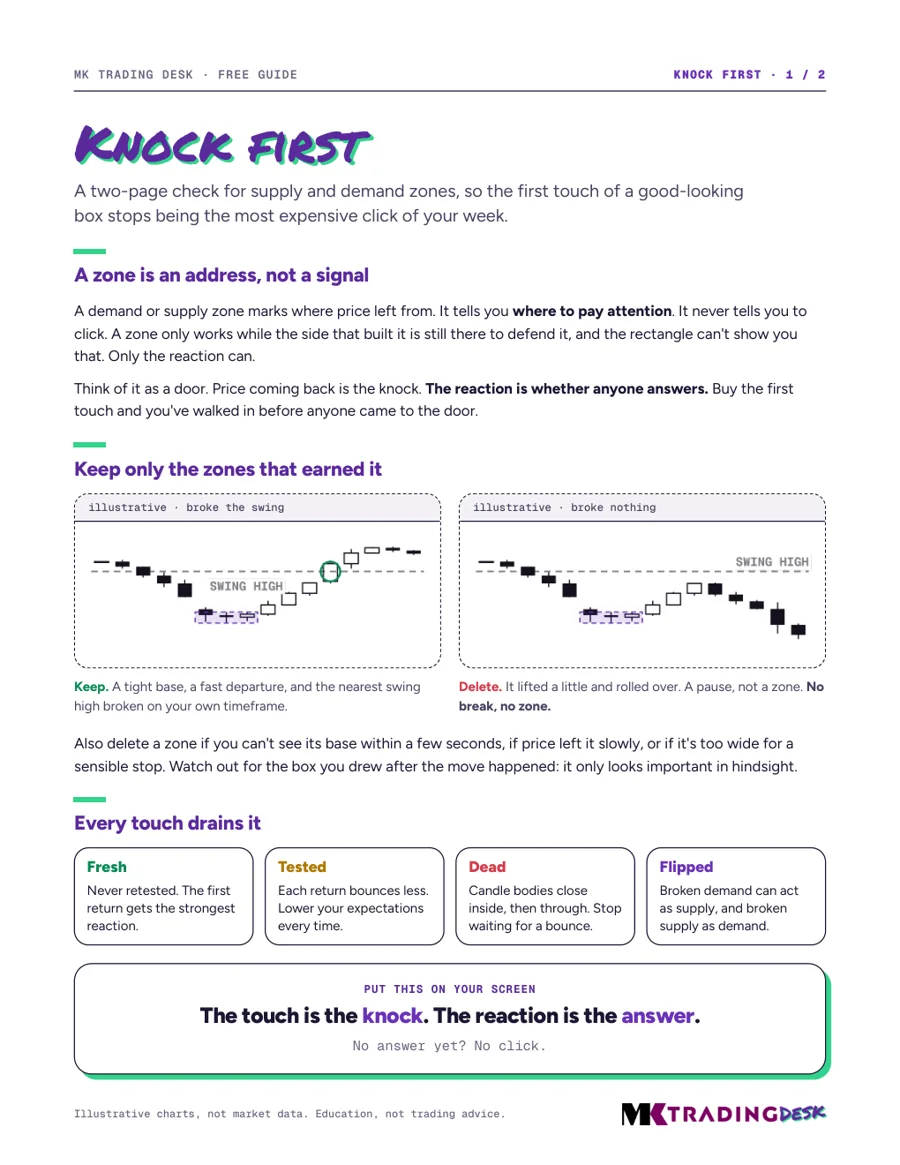
A zone is an address, not a signal
A demand or supply zone marks where price left from. It tells you where to pay attention. It never tells you to click. A zone only works while the side that built it is still there to defend it, and the rectangle on your chart can't show you that. Only the reaction can.
Think of it as a door. Price coming back is the knock. The reaction is whether anyone answers. Buy the first touch and you've walked in before anyone came to the door.
No break, no zone
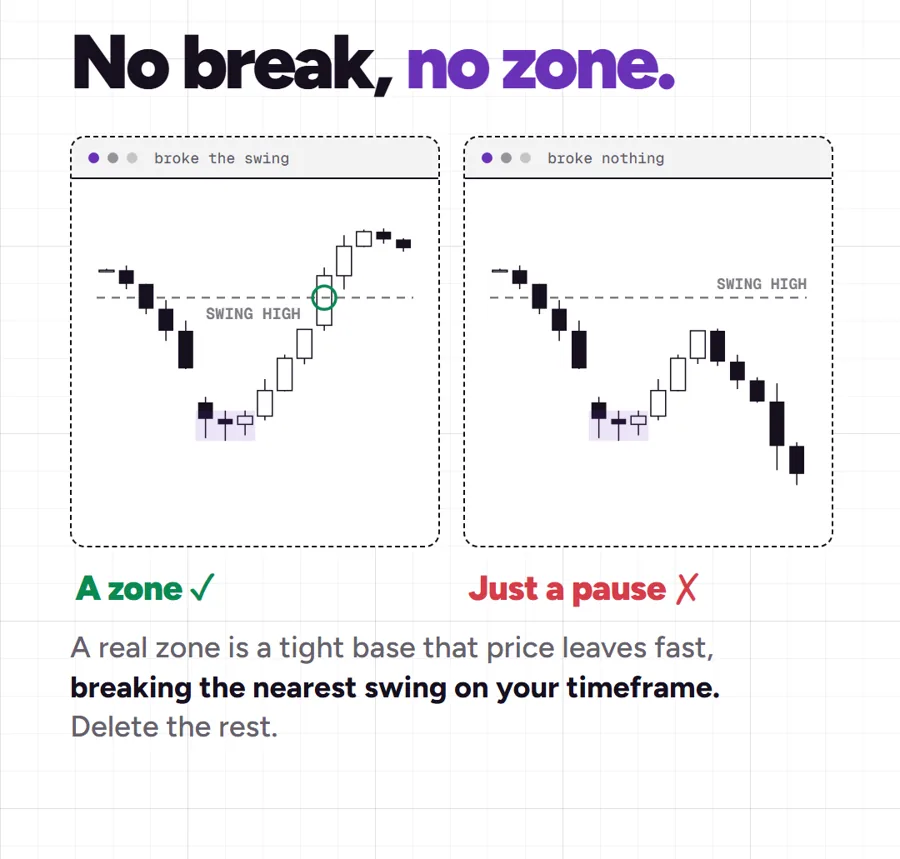
A real zone is a tight base that price leaves fast, breaking the nearest swing on your own timeframe. If it lifted a little and rolled over, that was a pause, not a zone. Delete it.
Delete it too if you can't see its base within a few seconds, if price left it slowly, or if it's too wide for a sensible stop. And watch out for the box you drew after the move happened: it only looks important in hindsight.
Every touch drains it
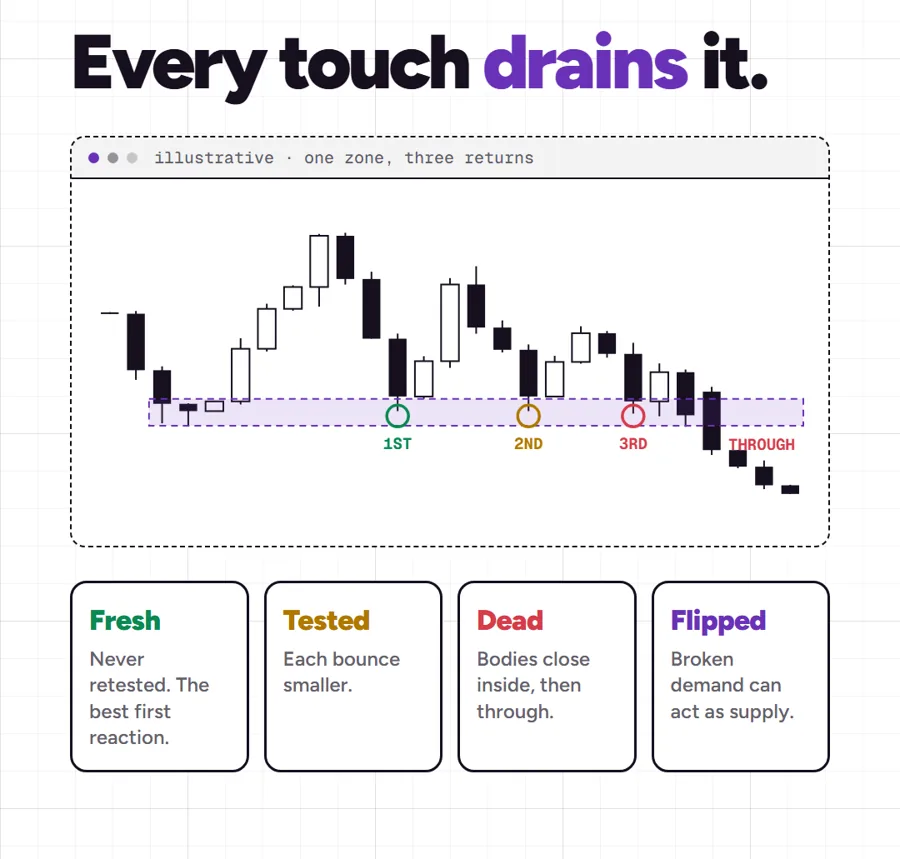
- Fresh: never retested. The first return gets the strongest reaction.
- Tested: each return bounces less. Expect less every time.
- Dead: candle bodies close inside, then through. Stop waiting for a bounce.
- Flipped: broken demand can act as supply, and broken supply as demand.
Wait for the answer
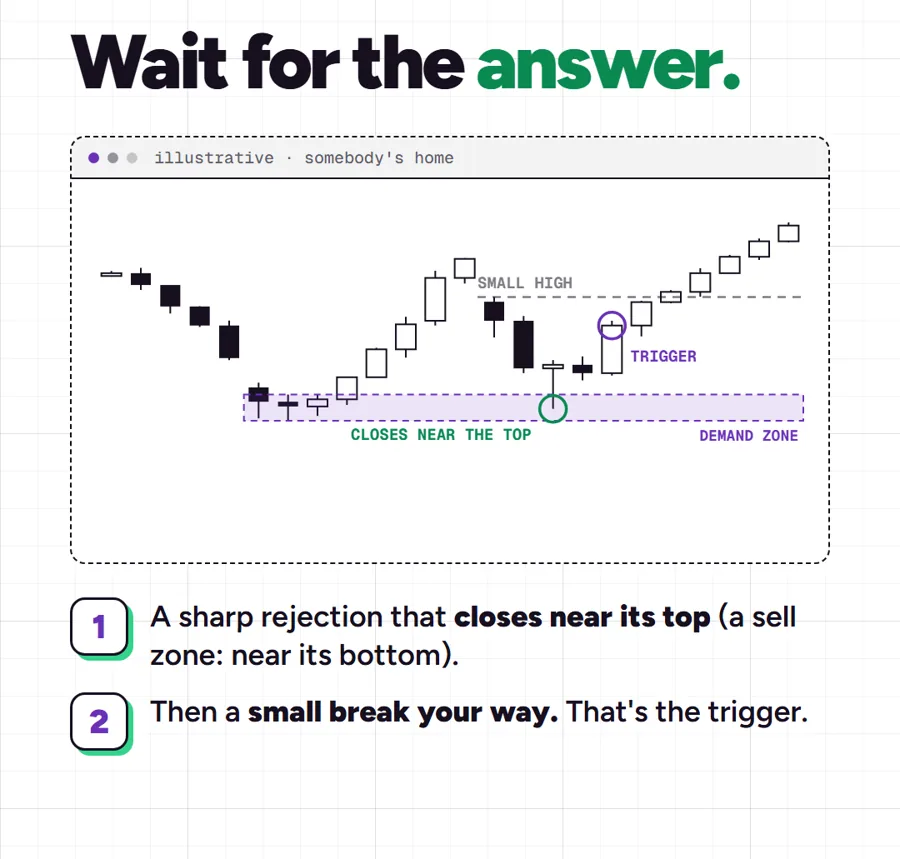
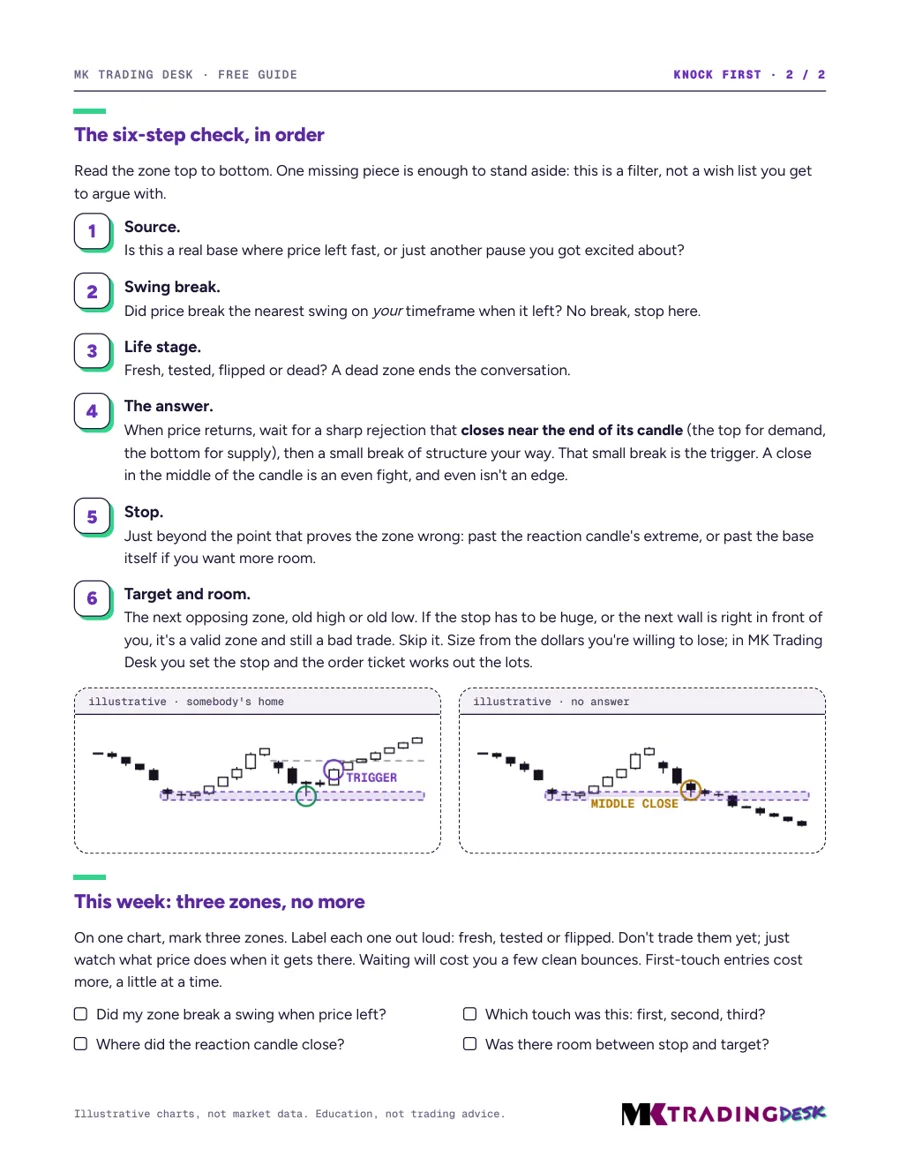
When price returns, wait for a sharp rejection that closes near the end of its candle: near the top for demand, near the bottom for supply. Then wait for a small break of structure your way. That small break is the trigger. A close in the middle of the candle is an even fight, and even isn't an edge.
Put the stop just beyond the point that proves the zone wrong, and the target at the next opposing zone or old high or low. If the stop has to be huge, or the next wall is right in front of you, it's a valid zone and still a bad trade. Size from the dollars you're willing to lose, never from a feeling. MK Trading Desk does that math for you: set the stop and the order ticket works out the lots.
This week: three zones, no more
On one chart, mark three zones. Label each one: fresh, tested or flipped. Don't trade them yet. Just watch what price does when it gets there. Waiting will cost you a few clean bounces. First-touch entries cost more, a little at a time.
Free PDF · 2 pages
Get the whole zone check
Which zones to keep and the six-step check before any entry, on two pages.
- Which zones to keep, which to delete
- The six-step check before any entry
- When a valid zone is still a skip
- A week's practice plan
Your guide is downloading.
Didn't start? Download it here (the link works for five minutes). Print the two pages and keep them beside your chart.